Track Time, Gain Insights, Stay in Control
Sign In Process
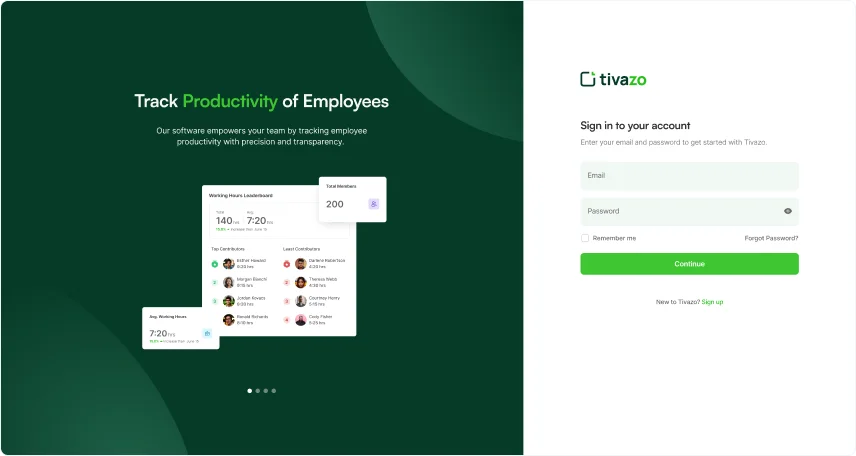
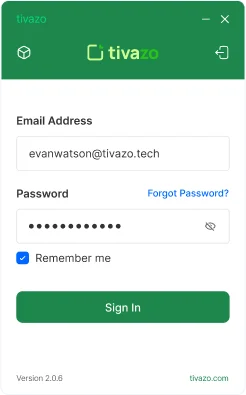
Log in to your Tivazo account using the same credentials you used when you first signed up.
Sign In Screenshot

Sign Up Process
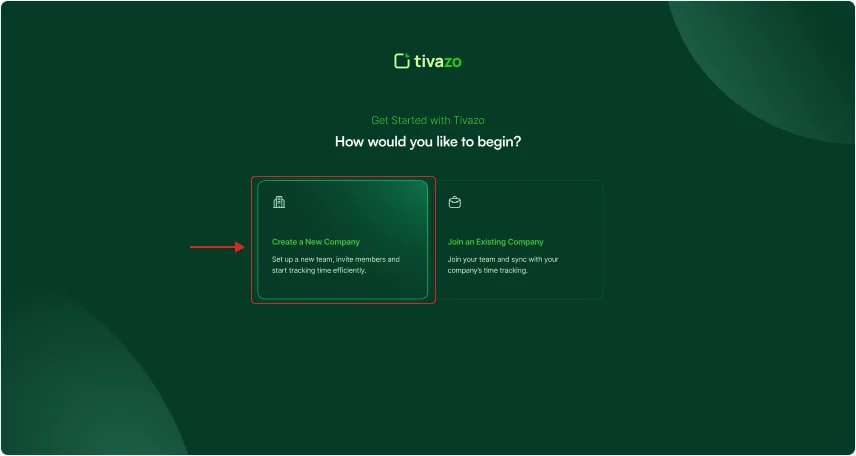
If you are the new member trying Tivazo, click on sign up to get started .Once you signed in to your Tivazo account, you'll see two options.

Create a new company
1. If you haven't createdyour workspace yet, clickon "Create a Company".
2. Before accessing the dashboard, review and complete the given requirements and fields to set up your account.

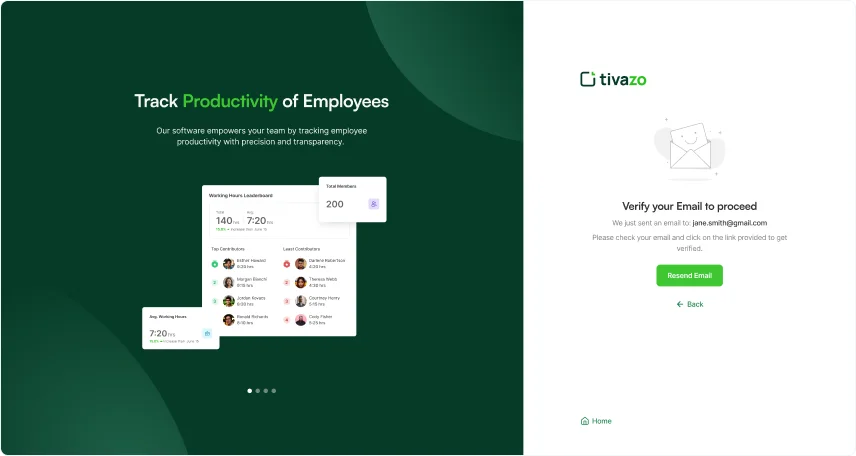
3. After completing the setup, you will be directed to a verification page. Confirm your account by clicking the verification link sent to your provided email address. You can either click Verify Your Account or use the link to proceed to the next step.
4. You will be redirected to the login page. Enter your credentials: email/username and password to access your account.
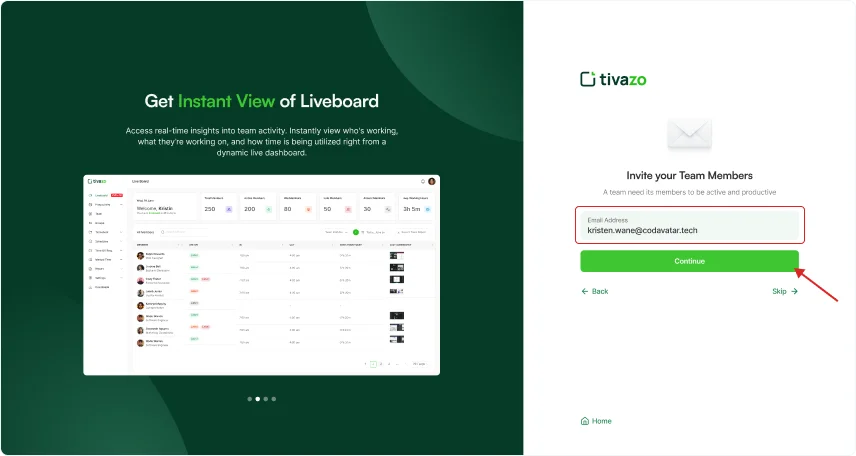
5. Next, invite your team members to the workspace you created. You can invite member individual one by one or in bulk at a same time by entering theirwork email addresses. Then click on “Continue” button to proceed.
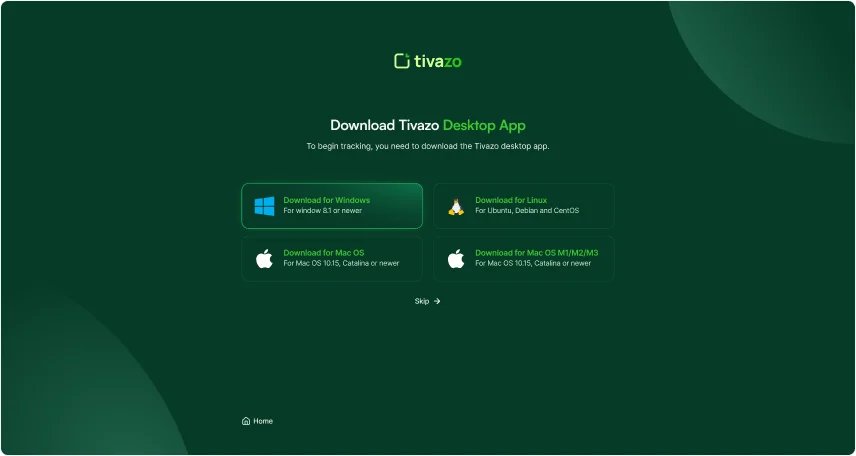
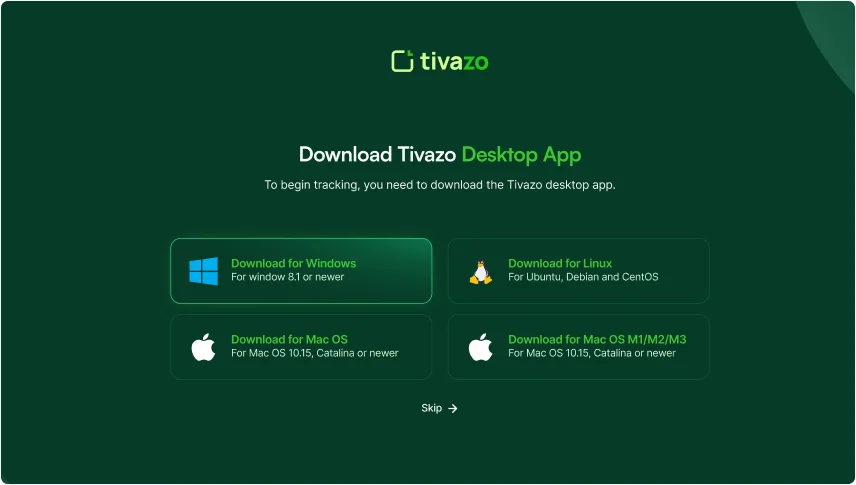
6. Now, you will see the download option. Select the version of the software that matches your operating system (Windows, macOS, mac intel, or Linux), then click to start the download. Follow the installation instructions, and you'll be ready to begin tracking your time.
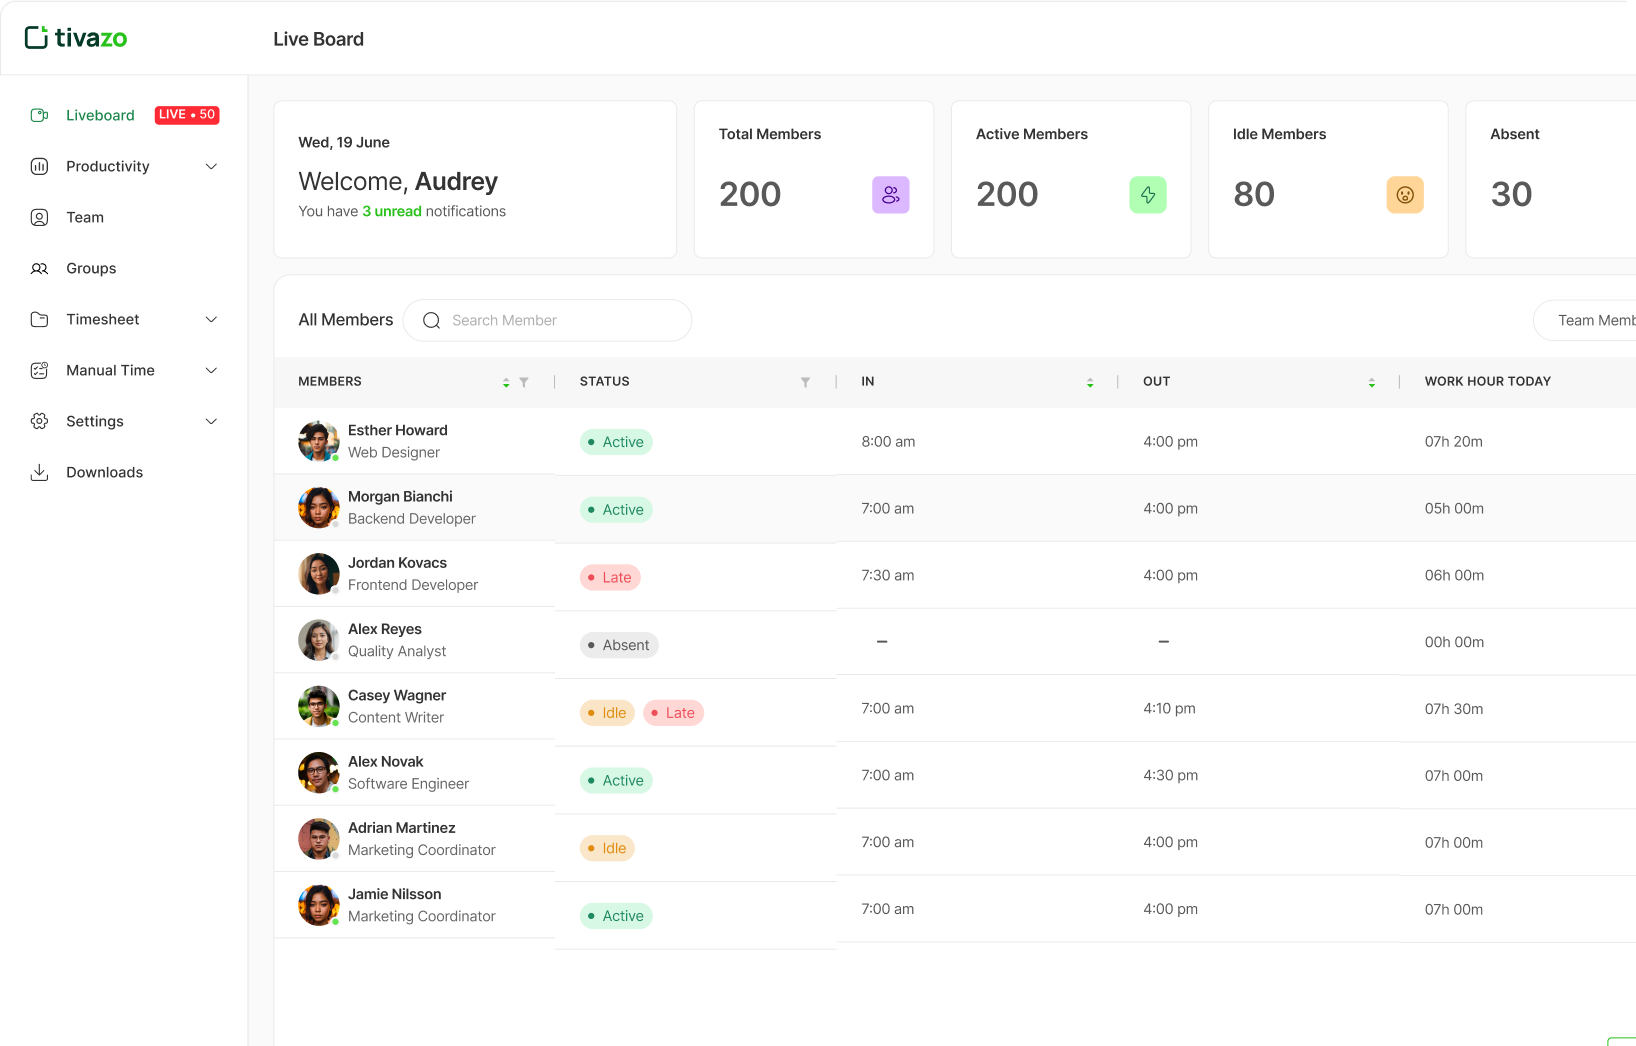
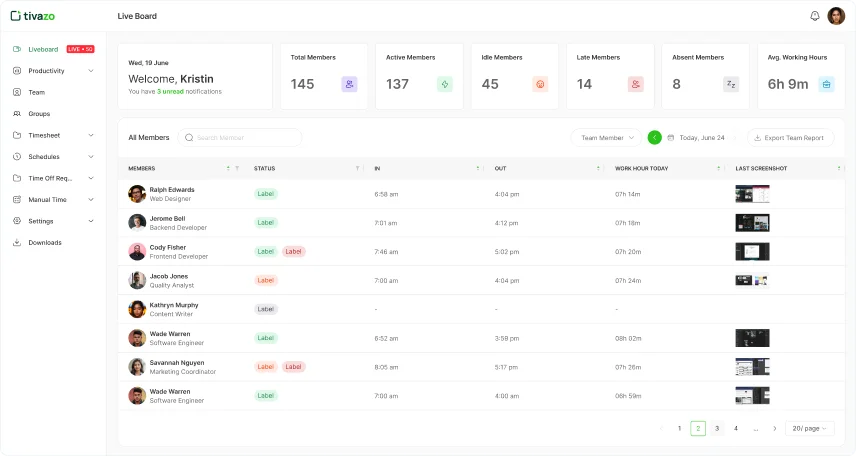
Live Board
After sending invitation, you'll be redirected to the "Live Dashboard” Page. You’ll get a clear view of total members, active participants, idle time, absent members and late arrivals – all in one place. You can quickly filter to see who is idle or late. Additionally, admin can view live screenshots on what team members have been working on for transparency and trust.
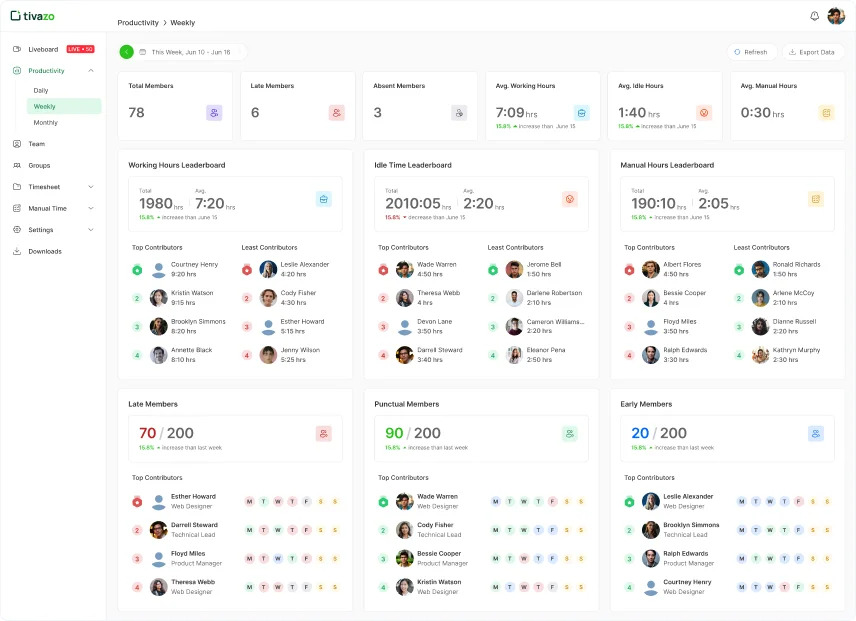
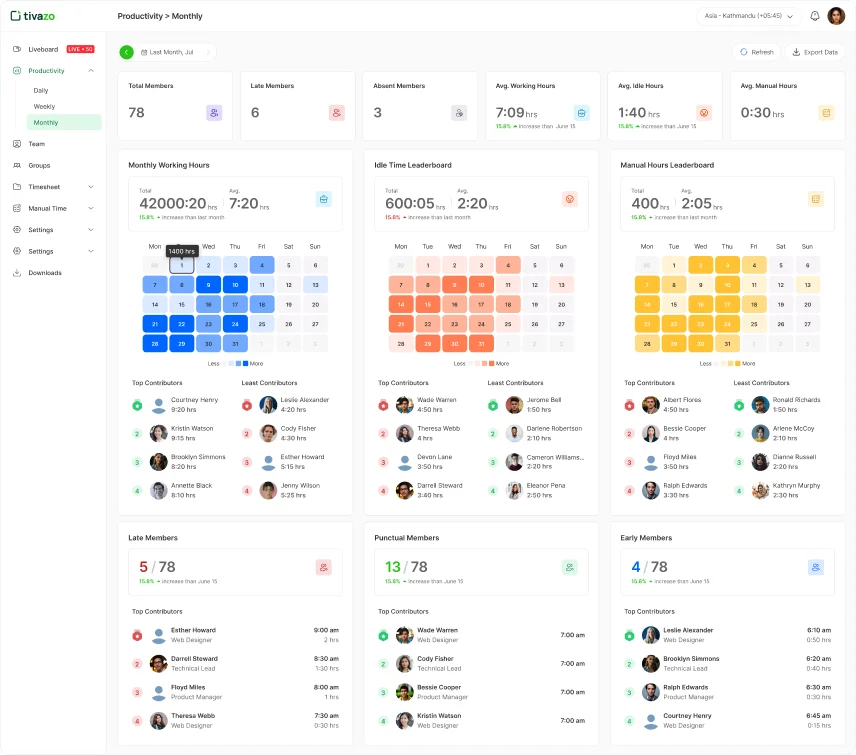
1. Productivity Feature
We’ve recently introduced the new Productivity Feature:
You can now view the average working, idle, and manual hours for all employees on a daily basis, giving you a clear picture of team activity. The Working Hours Leaderboard highlights top performers based on active work hours, while the Manual Hours Leaderboard tracks manually logged hours to ensure accuracy and avoid errors.
You can also monitor punctuality whether employees are on time, late, or early—helping you identify trends and manage attendance more effectively.
This feature encourages a more competitive and productive environment by tracking key metrics and improving work habits.
In addition to the daily view, you can also see weekly results and the Leaderboard to compare performance over time.
Finally, we have the monthly view, where overall monthly data is displayed in a heatmap. The shades represent how much work has been completed by your employees, with levels like 20%, 50%, or 70% to indicate productivity.
2. Team
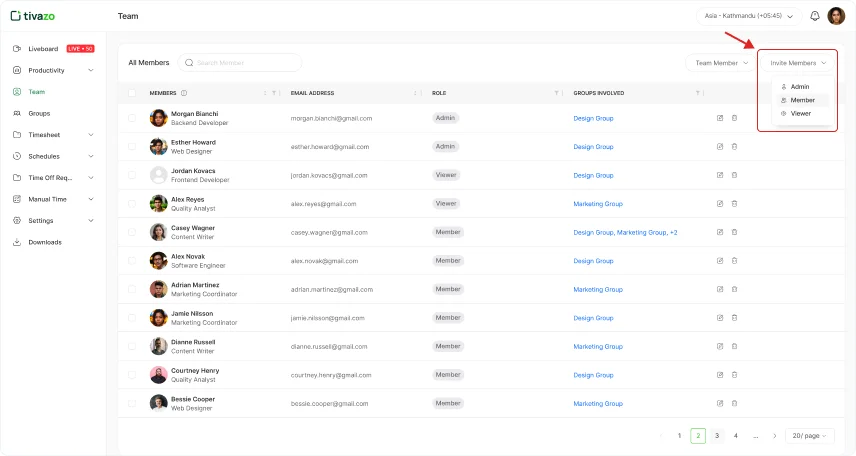
Once you’ve created the team or workspace, it’s time toadd member or viewer to the team.
1. To invite members, click on the "Invite Member" dropdown in the top right corner. From there, you can assign roles such as admin, viewer or member.
2. After selectingthe "Invite Member" option, anew tab will open. Enter the email addresses of the members you want to invite; you can add multiple members at once.
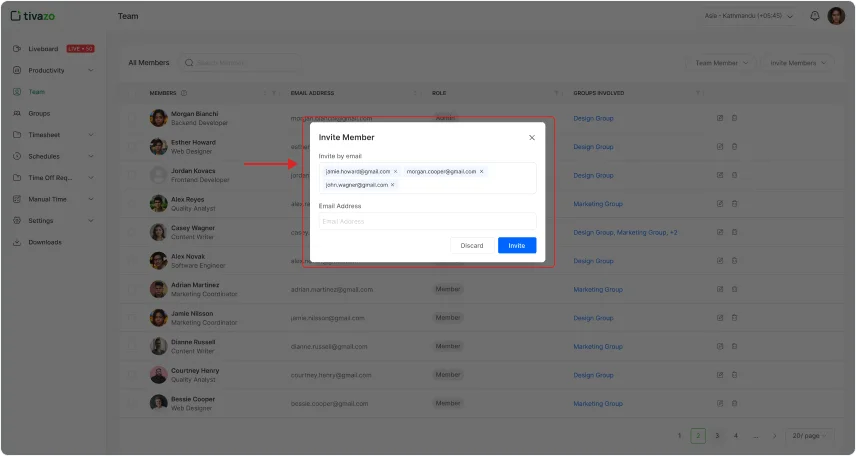
3. New memberswill receive an email with a confirmation link for verification to join. Clicking the link will redirect them to the sign-up page.
4. Invited membershould use the same emailaddress to sign up, set a password, and click "Sign Up." They will then be automatically added to your team.
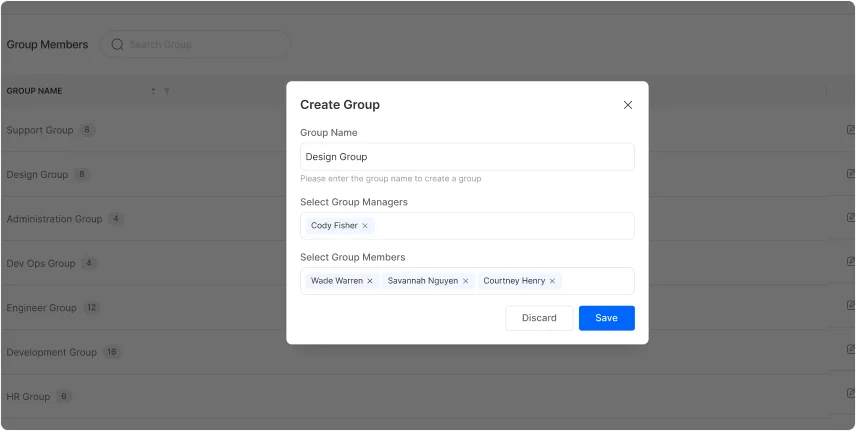
3. Groups
You can now create multiple groups within a single workspace. This allows you to easily organize your team based on projects, departments, or specific tasks.
To create a new group, head over to the top-right corner, and click on the Groups icon.
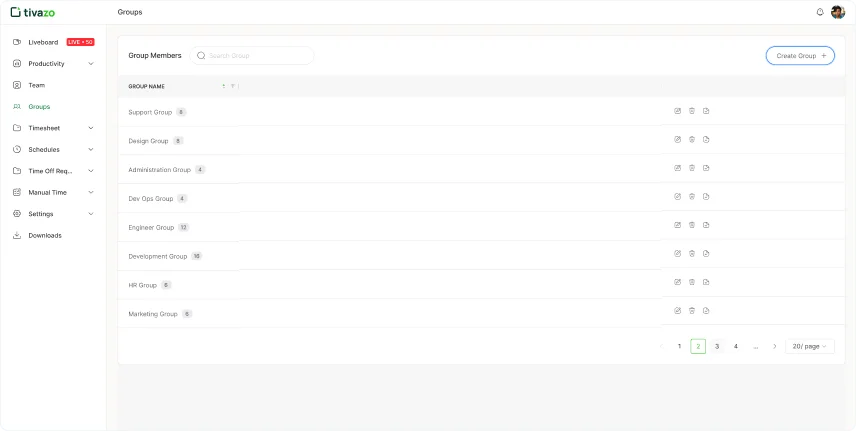
Now, just fill out the form with a group name, assign one or multiple managers, and select members to add to the group and your group is created easily.
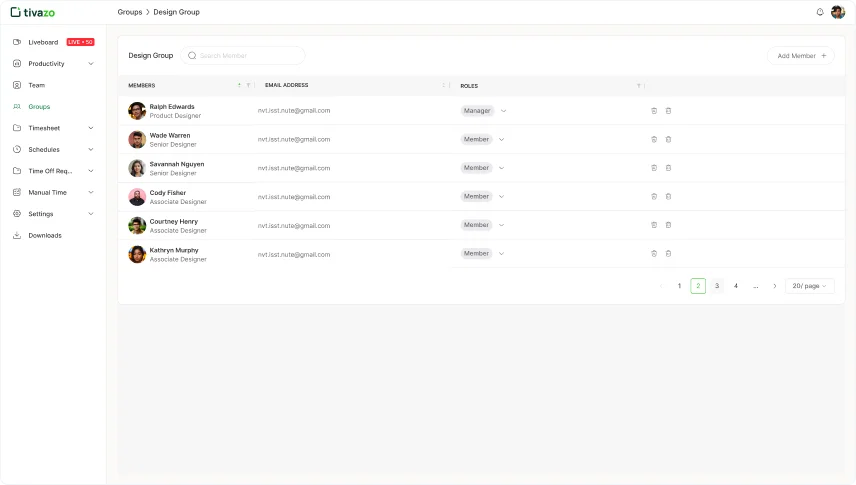
Once an admin assigns a manager to a group, the manager can send an invitation to the members. After accepting, they get access to their designated group’s dashboard.
Here the managers can see all the activities of their group members. By clicking on an individual member, managers can view live screenshots, track clock-ins and clock-outs, and monitor idle and active hours.

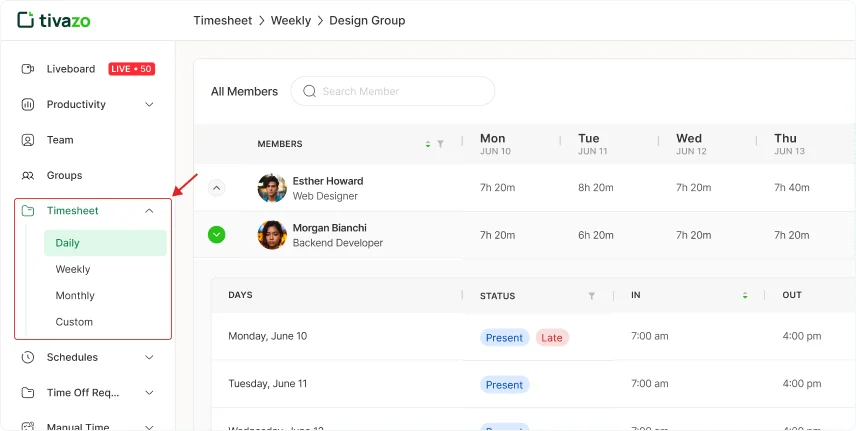
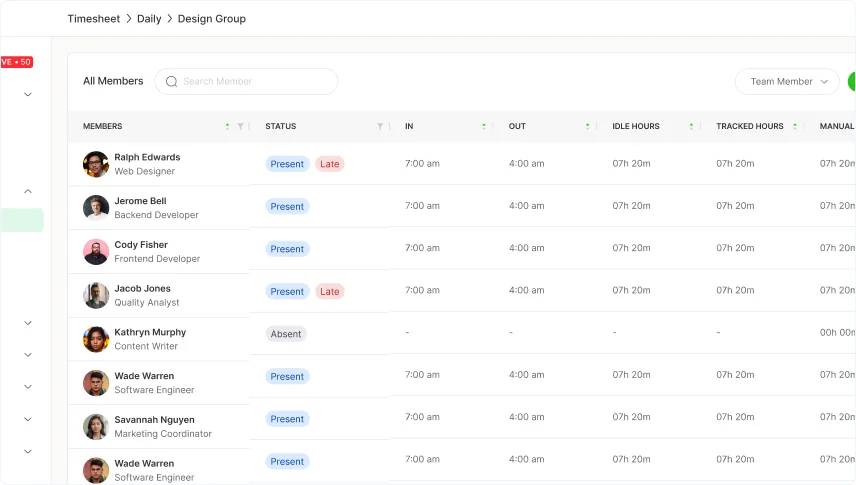
4. Timesheets
Click on “Timesheet” to viewof your team members and employees, and to generate report s.
In the dropdownmenu, you can choose to view activities on a daily, weekly,or monthly basis.
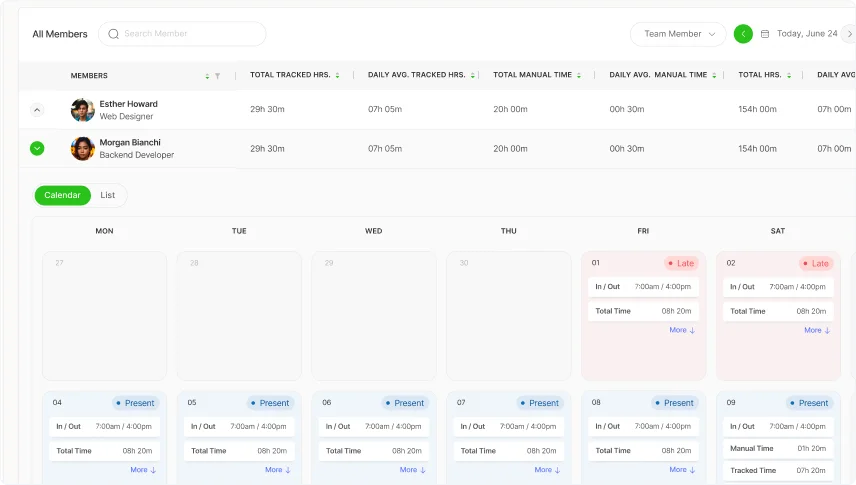
When you view monthly activities, you have two options for display. You can choose the Calendar View or List View. Choose the view that best fits your needs for tracking and managing activities.

5. Schedules
Tivazo now allows you to schedule meetings and plan team availability directly through the Schedules tab. This feature is integrated with your Google Calendar, helping you stay organized and on time.
Calendar View
1. Go to the “Schedules” tab on the left panel and select “Calendar.”
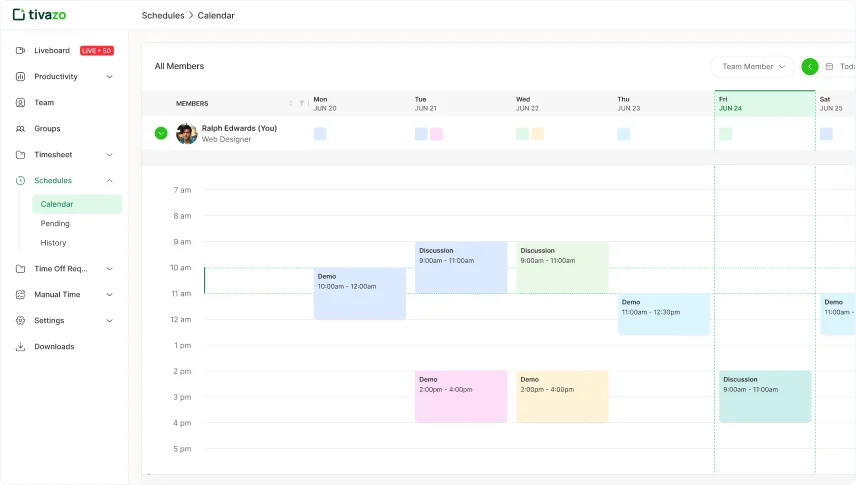
2. Tivazo now allows you to schedule meetings and plan team availability directly through the Schedules tab. This feature is integrated with your Google Calendar, helping you stay organized and on time.
3. A pop-up form will appear. Fill in: Event Name, Attendees, Date, Start and End Time, and Description or Agenda
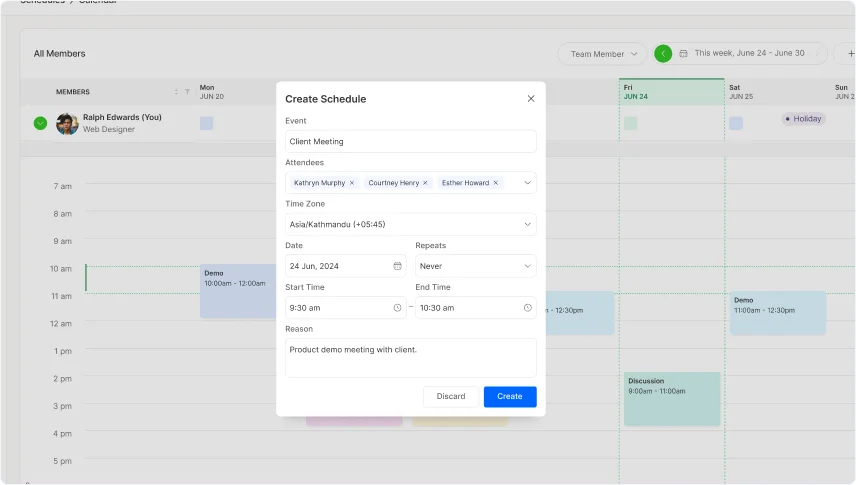
4. Check the option to “Notify via Google Calendar” so invited members are informed directly in their calendars.
5. Check the option to “Notify via Google Calendar” so invited members are informed directly in their calendars.
Once scheduled, the event will appear in your Tivazo calendar and Google Calendar automatically.
5.1. Schedule Request
All meeting schedule requests made by your team appear here.
- 1. Click on “Schedule Request” under the Schedules tab.
- Approve to confirm and notify participants.
- Reject if the meeting is unnecessary or conflicts with other plans.
2. You’ll see a list of pending requests. For each request, click:
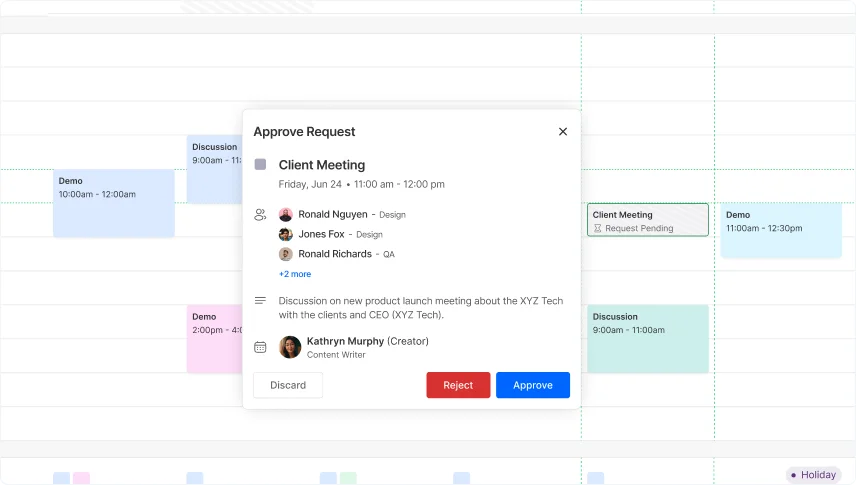
3. You can track status of each request — Approved, Rejected, or Pending at a glance.
5.2. History
To review all past meeting requests and their outcomes:
1. Go to “History” under the Schedules section.
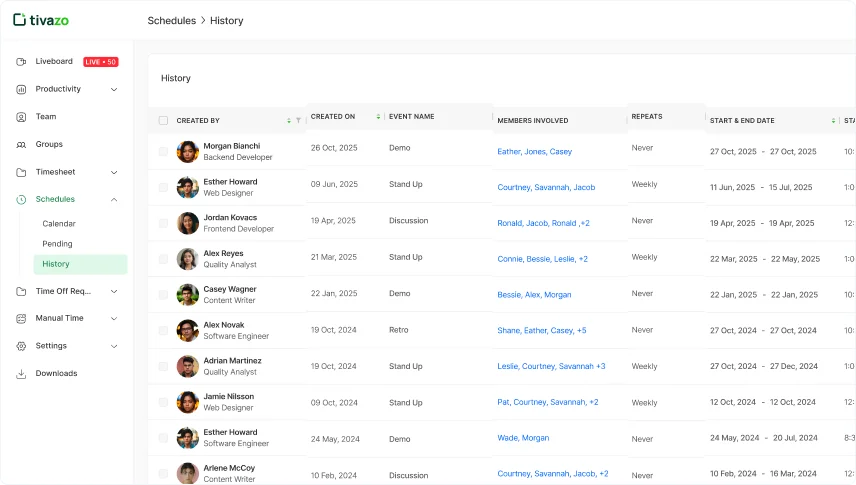
- 2. Here you’ll find:
- Here you’ll find:
- Rejected requests
- Approved but not yet held events
6. Time Off
This feature helps employees request leave due to illness, emergencies, or personal needs. Admins and managers can review, approve, or reject these requests with full visibility and control.
- 1. Click on the “Pending” tab.
- Leave Type Select the appropriate type of leave from the dropdown: Annual Leave, Sick Leave, Forced Leave, Mourning Leave, Others (for custom reasons)
- Start Date – End Date Select the range of days you are requesting time off for.
- Select Shift Choose one of the following options: Full Day, First Half, Second Half, Custom
- Add a short description or explanation for your leave.
2. In the top-right corner, click “Add Time Off.”
A pop-up form will appear with the following fields:
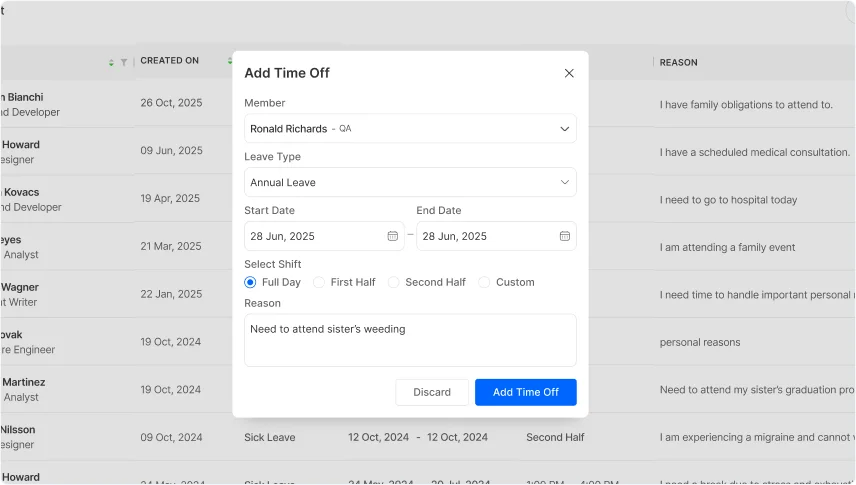
After completing the form, click “Send Request.” The request will now be visible under the Pending list for manager/admin review.
Approving or Rejecting Requests
Admins or managers can take action directly in the Pending tab:
1. In Time Off > Pending, all time-off requests will be listed.
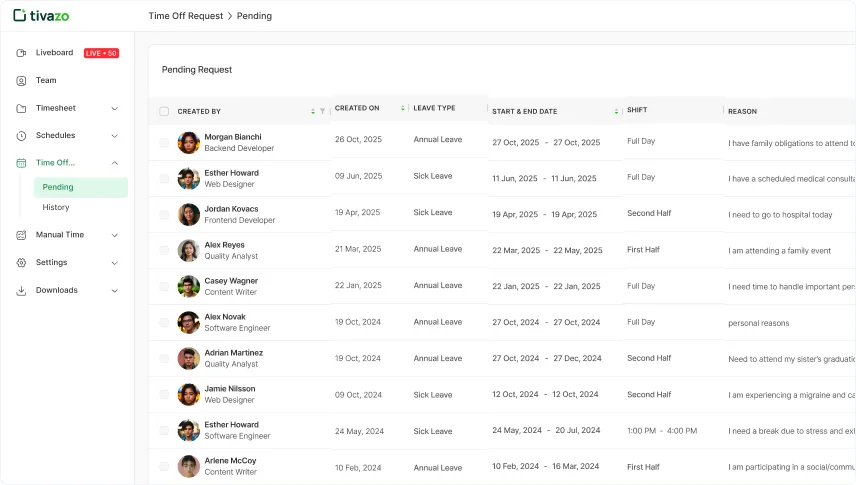 2. For each request, click “Approve” or “Reject.”
Once approved or rejected, the request status is updated and moved to History.
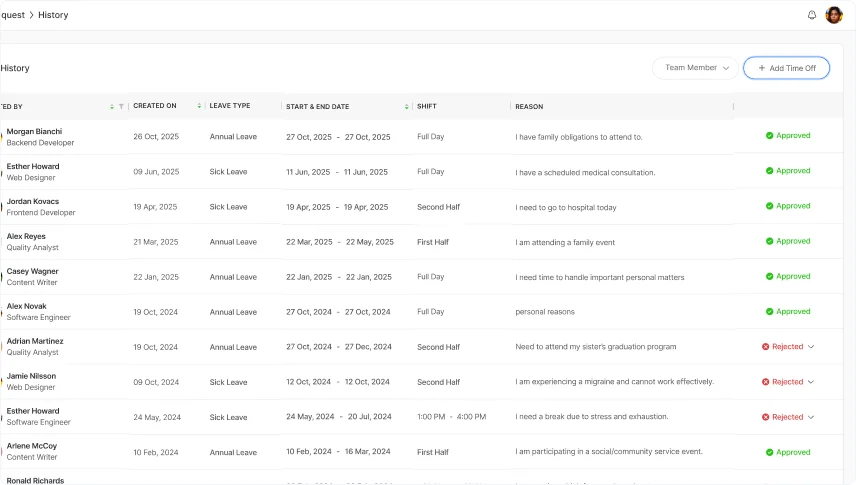
6.1. Time Off History
To view the complete record of time-off requests:
1. Click on “Time Off > History.”
2. This section displays:
Approved, Rejected and Past Pending entries (if any)
This gives both team members and admins clear visibility over all leave activity and helps with future planning.
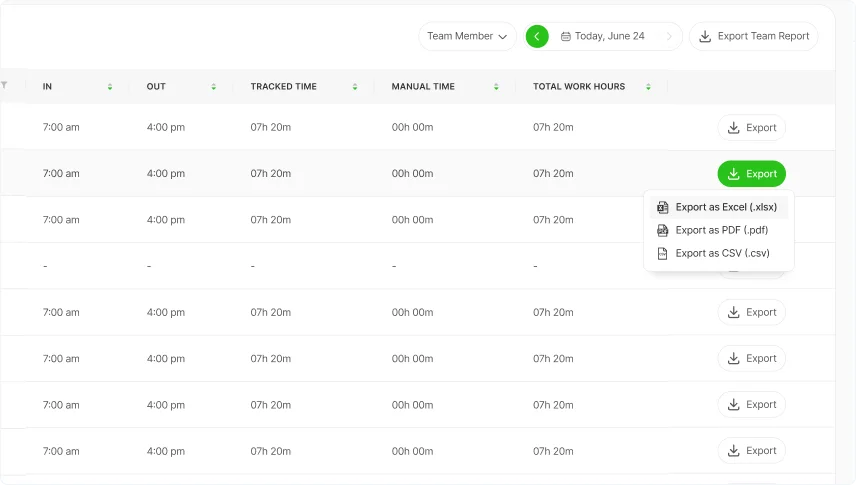
7. Reports
Tivazo gives you reports either individually or as whole team in different forms such as csv, excel and pdf so you can easily search and review your employee’s history.
1. To get the Team Report, click on export Team Report on right corner side, find what format you want to choose and your report is exported to your desired fie location.
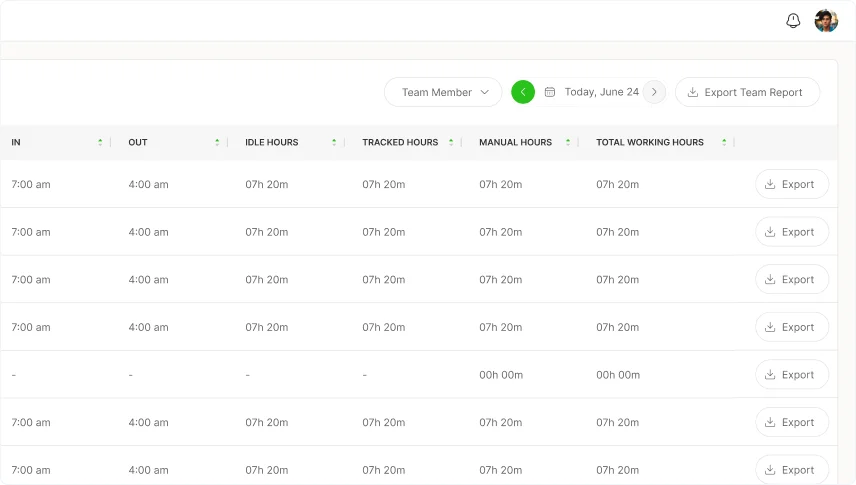
2. To get an individual report, go to the Timesheet section, select the person you want to report on, then click the export button on the right side of their name. Your report will be generated quickly.
3. To get a report for specific members, go to "All Members," type their name, and specify the dates or time frames. This will help narrow down the report to the information you need.
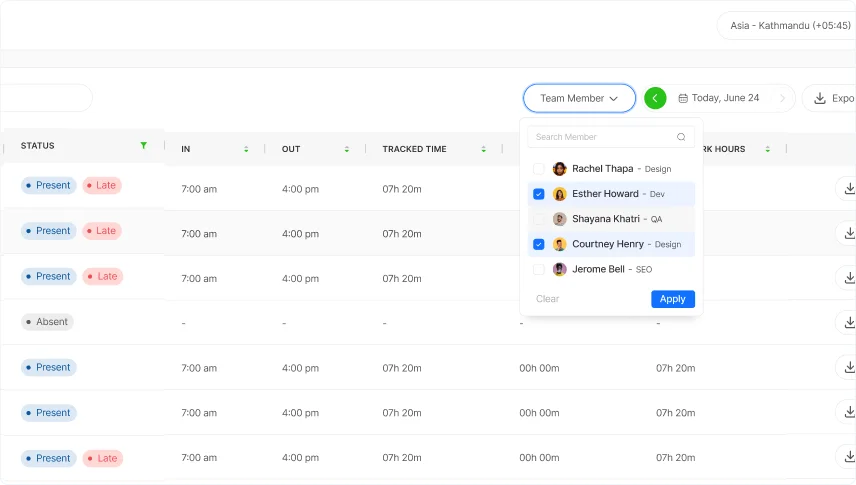
4. You can also search an individual from the team and click the export button to generate specific individual report.
5. You can search for certain team members report as well by clicking and choosing the specific members you want for report generation.
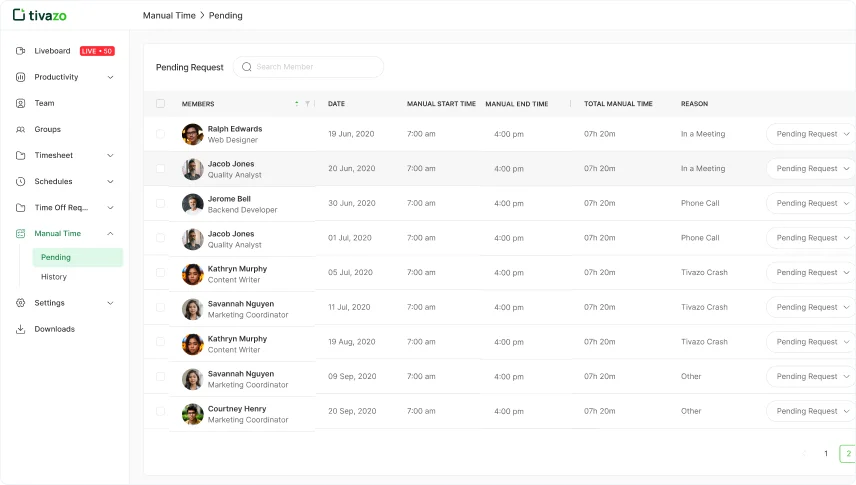
8. Manual Time
You can easily approve or reject break requests from employees and track the history of these actions. This provides precise oversight and allows you to manage break periods effectively, ensuring all breaks are accurately recorded.
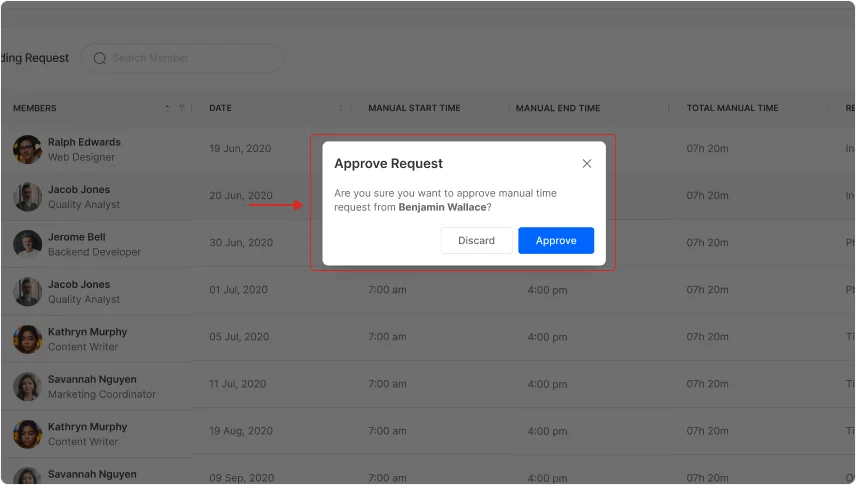
1. Click on "Pending" in the ManualTime section. In the right corner, you’llfind options to either approve or reject the employee's break request.
2. Now, new tab will pop up asking for confirmation before approving or rejecting the employee’s request. Click the “Approve” button to proceed.
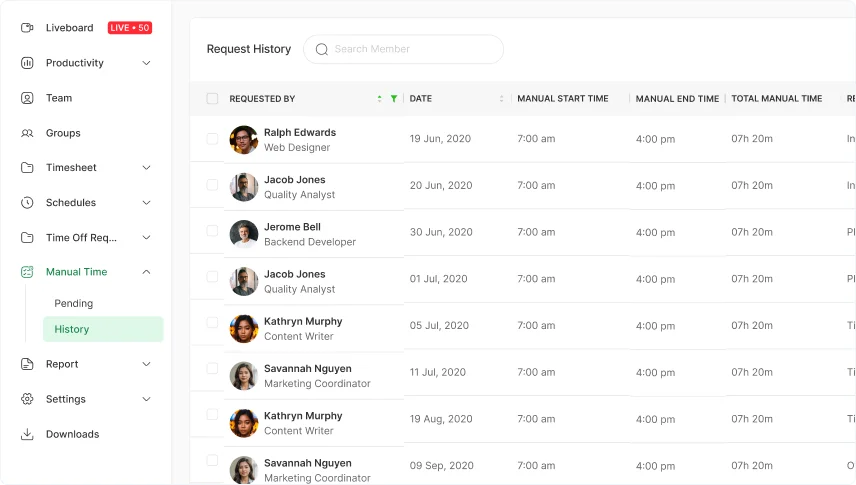
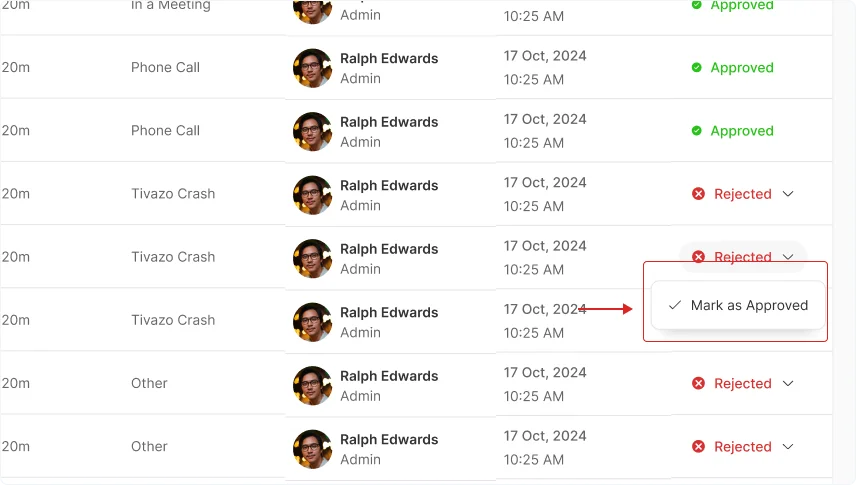
3. Click on "History” to track employee requests. Here, you can change a request from approved to rejected or vice versa and the neb tab appears where you have to confirm either to proceed the change or not. To proceed click on “Approve” or “Reject” button.
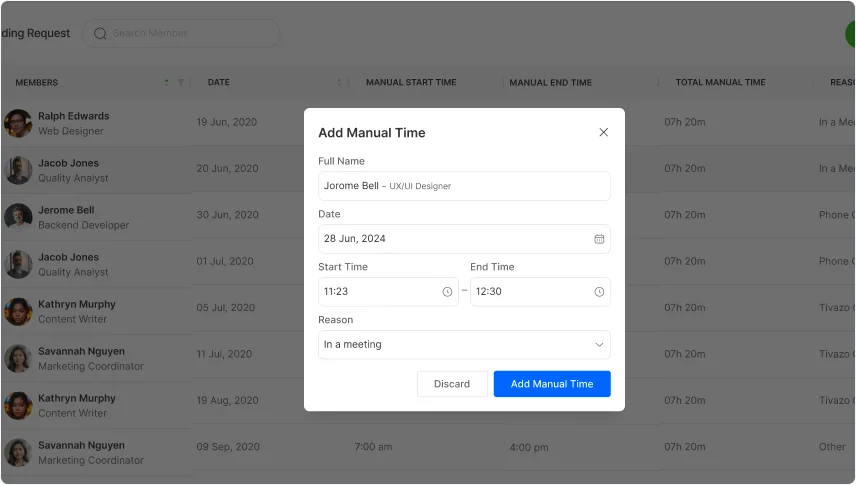
4. To set manual breaks for employees, click the “Add Manual Time” button. A pop-up card will appear whereyou can entermember emails, set dates and times, and specify the break reason.
9. Workspace
1. Go to the “Workspace”. Here, you'll find all the details of your workspace profile. Click the "Upload Image" button to upload your workspace profile picture.
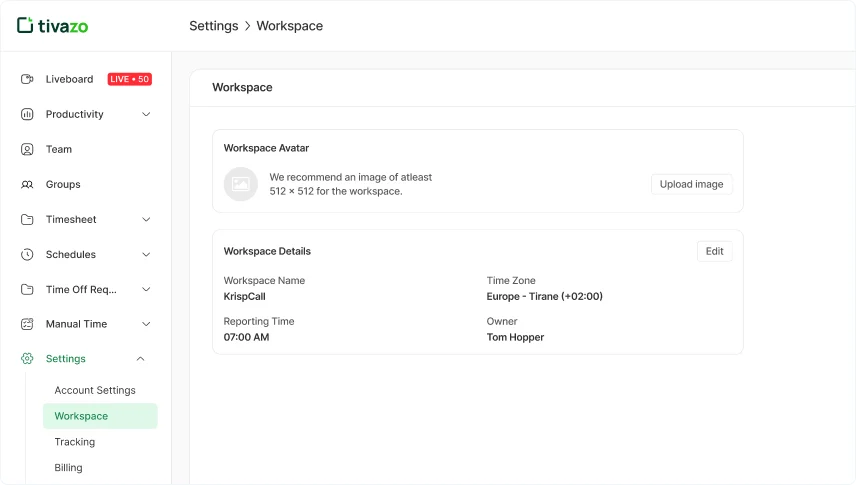 2. Select the file from your computer following the recommendation size given.
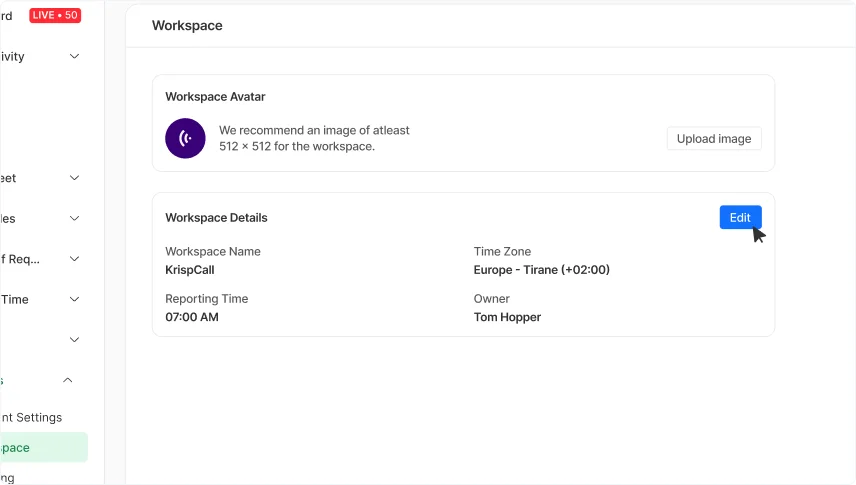
3. Next, click on “Edit” button to change or update the required fields such as time, zone and name of workspace.
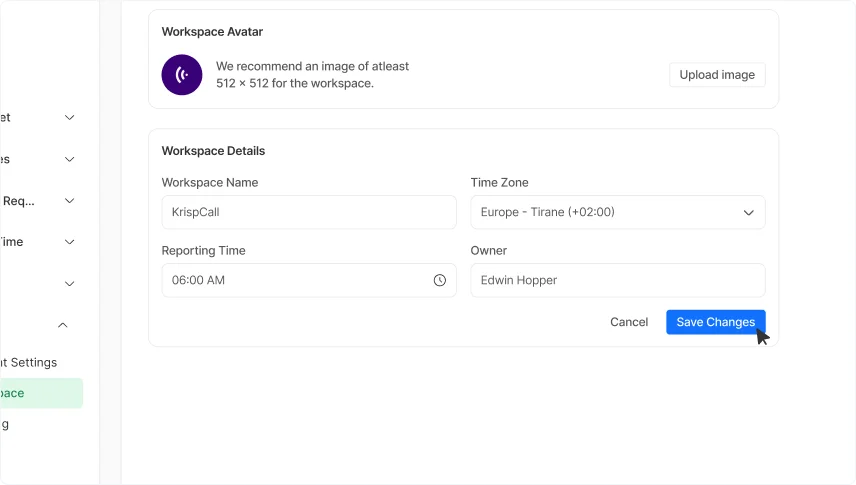
 4. To select the time and time zone,click the dropdownoption, choose the appropriate zone and time for your team members, and click "Save Changes" to update your workspace.
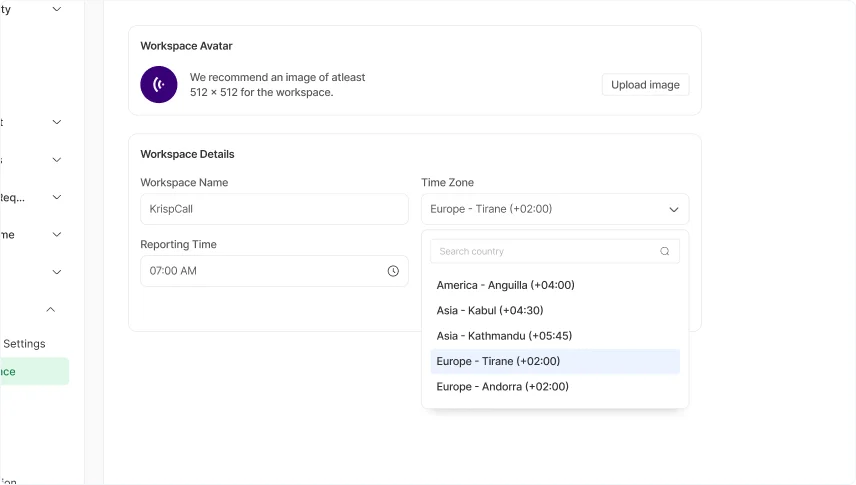
 5. You can set the grace time, allowing you to customize the period after which an employee is marked as late.
- 6. You can also set the weekdays and weekends accordingly.
10. Tracking
1. Go to the “Tracking” section and choose the screenshot frequency that best suits your needs. Adjust the settings to capture screenshots at intervals that align with your team's workflow and monitoring requirements.
2. You can also see the masking feature option: just slide it on or off, set the keywords, and you're done! If the mask feature is turned on, any screenshot containing the specified keywords will be blurred.
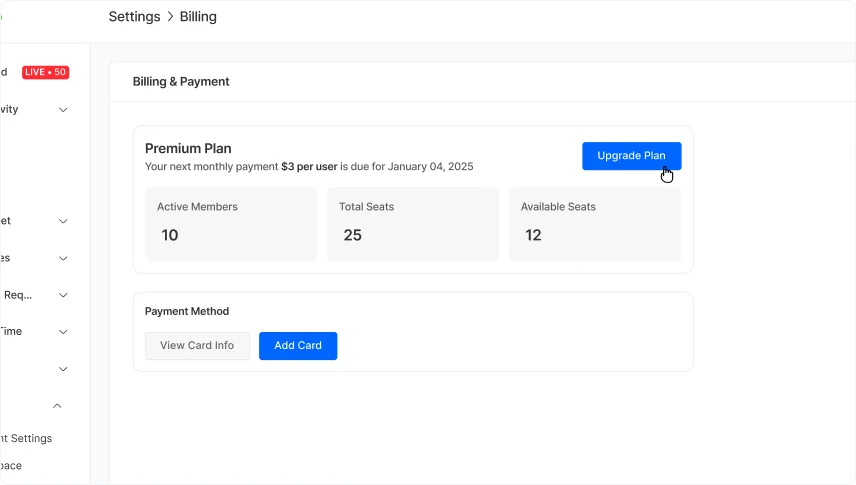
11. Billing
1. To review your billing details, click on "Billing" in the Settings. You'll see information about your active users and current plans. To change the current plan click on “Change Plan” button.
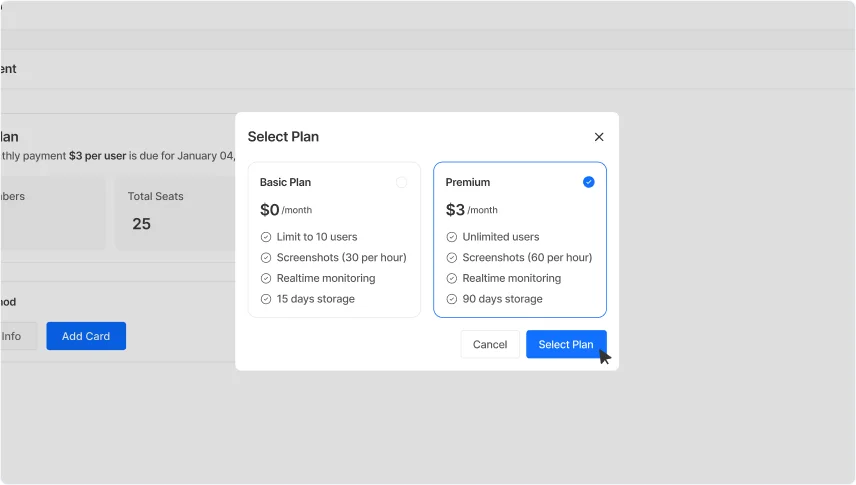
2. A new tab will open, displaying the available options.Select the suitableplan for payment and proceed with your chosen plan clicking “Select Plan”.
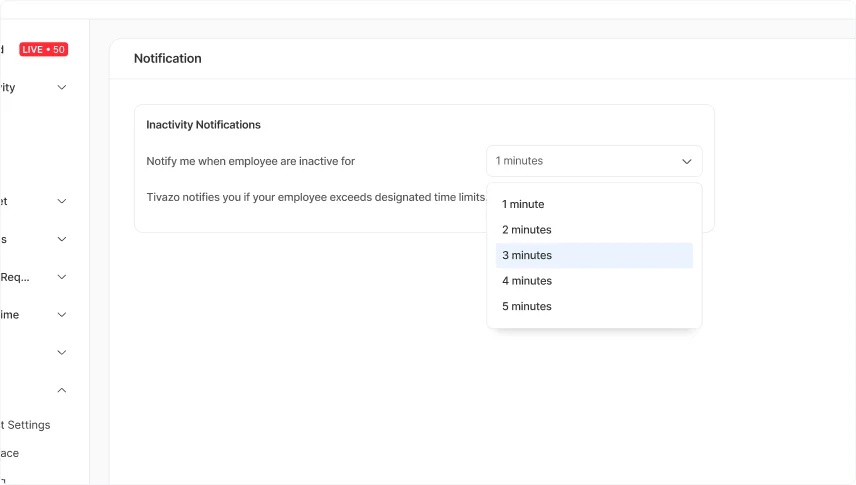
12. Notification
Go to the "Notification" section in Settings to set alertsfor employee inactivity. You'll see a dropdown option to select the interval for these notifications, click on it to make changes. Select the one that suits your needs and proceed with that choice.
 The confirmation message is popped up for notification inactivity alerts has been updated.
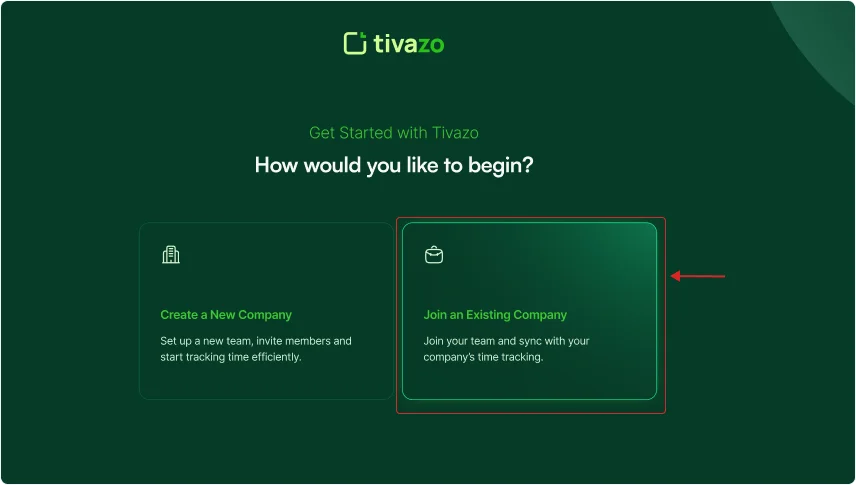
Joining Existing Company / Members Login
1. If you already have a company, select "Join an Existing Company”.
2. Now, enter the work email provided by your company or the valid email address you used when creating your company on Tivazo.
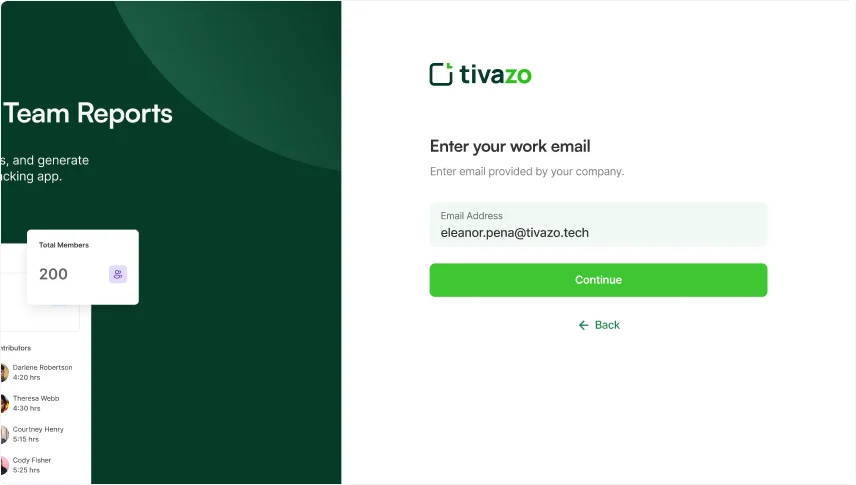
Or, if you have receive the invitation, accept the invitation and you'll be taken to yourworkspace.
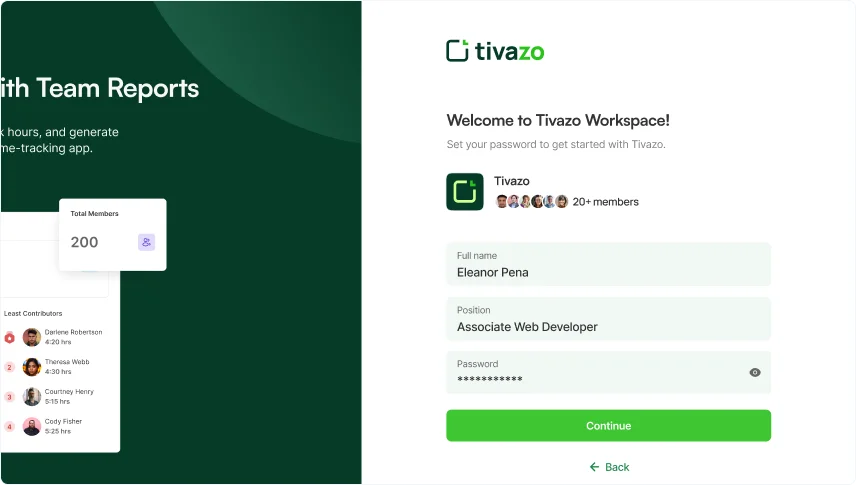
3. Now, fill out the form with the required information, such as your “Full name”, “Position”, and “Password” and click on continue to access the dashboard.
And then download option is shown, install Tivazo on your devices, according to your compatible operating system.
You will now be taken to live dashboard, where you can view detailed working information. You can add manual times and update your profile.
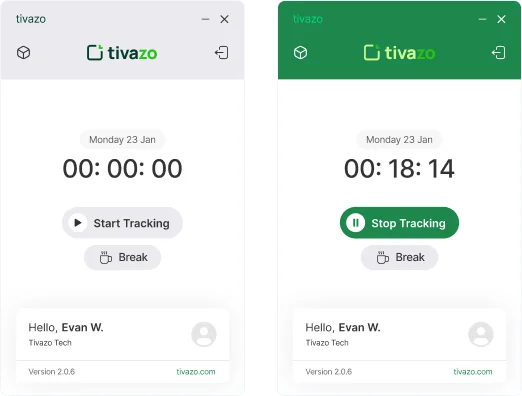
4. After installation, a tracking pop-up will appear. Enter your credentials to log in and then click on “Start Tracking” to get started.
When you start tracking, the timer runs, and you’ll see a green 'Stop Tracking' button with a 'Break' option below.
Hit 'Stop Tracking', and the timer pauses. The button turns gray to 'Start Tracking', and it shows you’re 'On a Break'.
When you're ready, click 'Start Tracking' to resume. The timer picks up where you left off, and the green 'Stop Tracking' button comes back.
Tray Menu Overview for Tivazo
When you start tracking time, there is a little tray menu over the notification bar of your device, click right on the tray menu, you get all these option:
Time Tracking Display
When you hover over the tray icon, it shows the total time tracked so far.
Stop Working
Allows users to stop tracking their work session.
Time Display
Displays the total active working hours in real-time.
Navigation Options
Provides quick access to the dashboard, focus mode, and sync data.
Session Controls
Options to log out or exit the application.
This menu ensures efficient time management and seamless navigation for users.

Start For free, and it's forever
Optimize your workflow with Tivazo's platform, built for seamless task management and maximum efficiency.